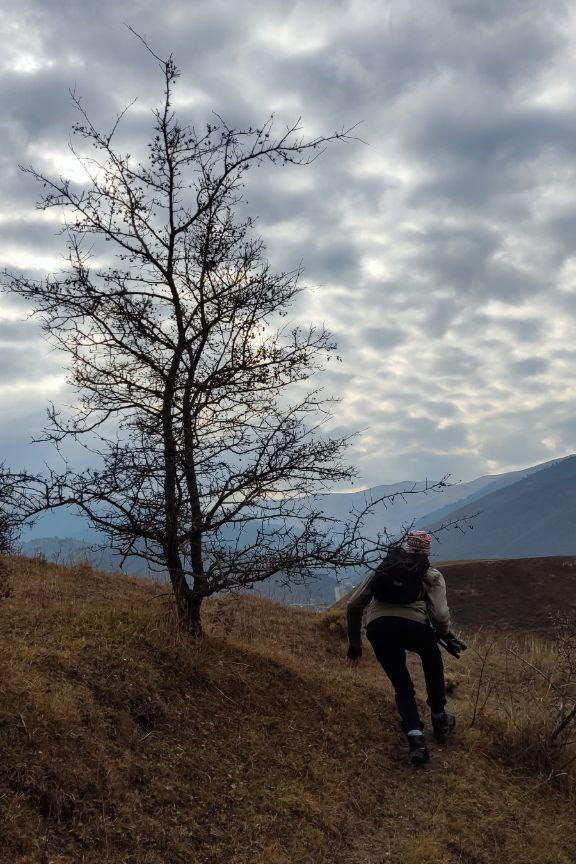
Hey friends! I thought it would be nice to share with you how I pack my things for a plein air hiking trip. I’ve had a nice walk yesterday in the mountains of Lori province, Armenia, where I live with my family. It is a beautiful place and I’d recommend you to visit it one day.
So I intended to make a couple of colour sketches of my favorite panel size 5×7 inches. I have cut some with my CNC recently and ground it with Michael Harding acrylic primer. Here is what I’ve got here:
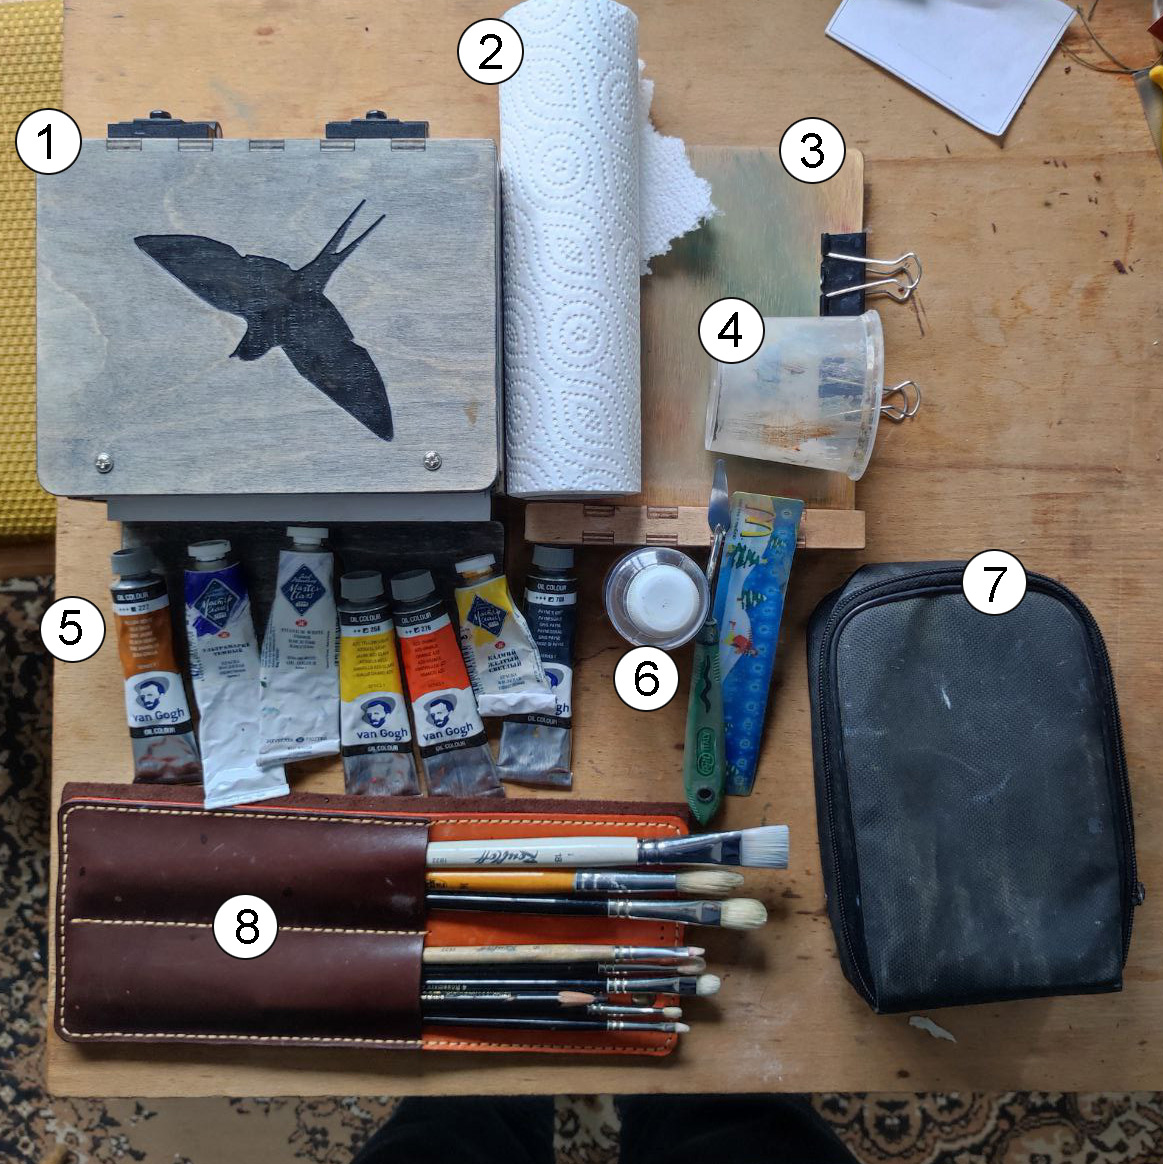
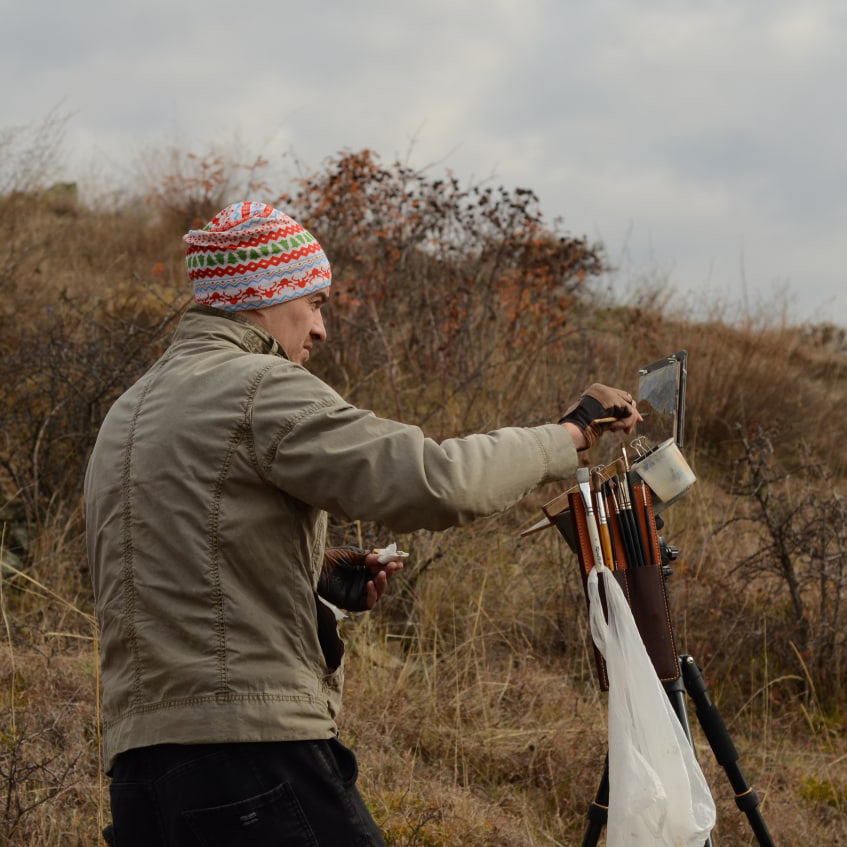
1 – A small day trip pochade with wet panel carrier for 4 panels. It’s my design of course 🙂 I’m going to put everything in my backpack, and this one is not going to break my back.
2 – Some paper towels to wipe my brushes. Sometimes I also paint with them but would really recommend a cloth for this purpose.
3 – The extension side palette. The box is small so I need some extra mixing space. This one is slot-in, no screws needed. This is my design also, check the link if you are interested.
4 – I use the plastic cup for my solvent – an odourless mineral spirit. I don’t spend much solvent, so this option is the most lightweight and if I need to wash a big brush, I always could add more. I used to have metal dippers in the past, but they are expensive and less handy overall.
5 – Paint tubes. I put my paints on the box’s palette before going outside and there are more colours than paint tubes. That’s because I am pretty sure I have enouth paint on the palette to leave the tube at home. Though, I always take my titanium white, yellow ochre, ultramarine blue deep, Payne’s grey, permanent orange, permanent yellow and cad yellow light.
6 – The solvent, the palette knife and a plastic bookmark from McDonald’s – an indispensable thing for painting thin lines with thick paint. I love it when painting forest interior. Always feel free to use whatever suits you 🙂
7 – Handmade leather brush case with brushes.
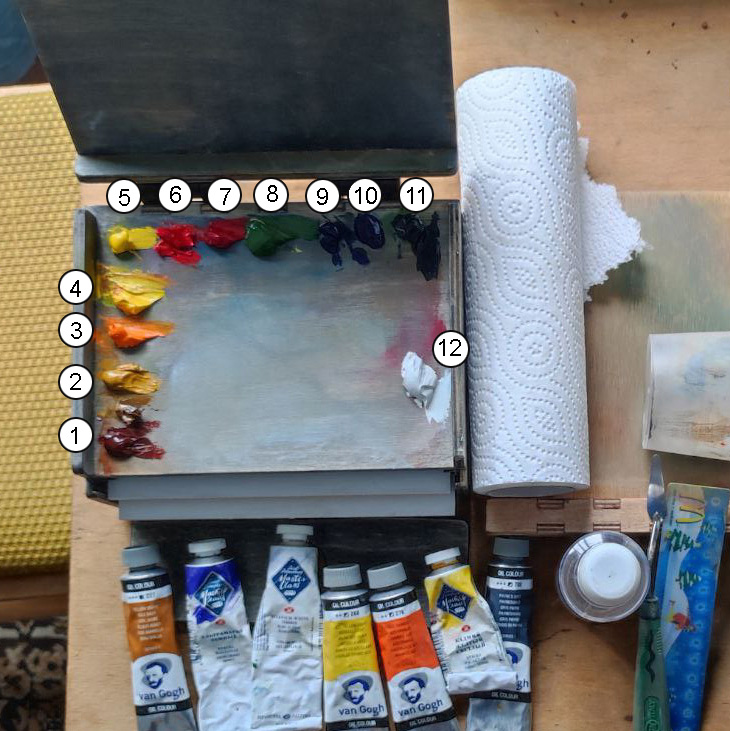
These are the paints I use. Somehow there are 12 numbers, but 13 paints.
1 – Transparent oxide red and yellow
2 – Light ochre
3 – Permanent orange. Would prefer cad, but it’s too expensive.
4 – Permanent yellow. I use it because it could be mixed with everything, and also it’s affordable.
5 – Cad yellow light when you need a final opaque touch, highlights.
6 – Cad red medium
7 – Quinacridone rose for vivid violets and mixing with chromium oxide to get the opaque black.
8 – Cromium oxide. It’s good to add some to the mixture of white and phtalo blue to make kinda substitute for my favorite sky paint – Chromium cobalt blue-green, which is crazy expensive. And also after the accident at Norilsk Nickel I’ve decided to get rid of all cobalts because of ecology reasons.
9 – Phtalo blue. Great strong transparent greenish blue. Very affordable also.
10 – Ultramarine deep
11 – Payne’s grey. Could be Ivory black.
12 – Titanium white
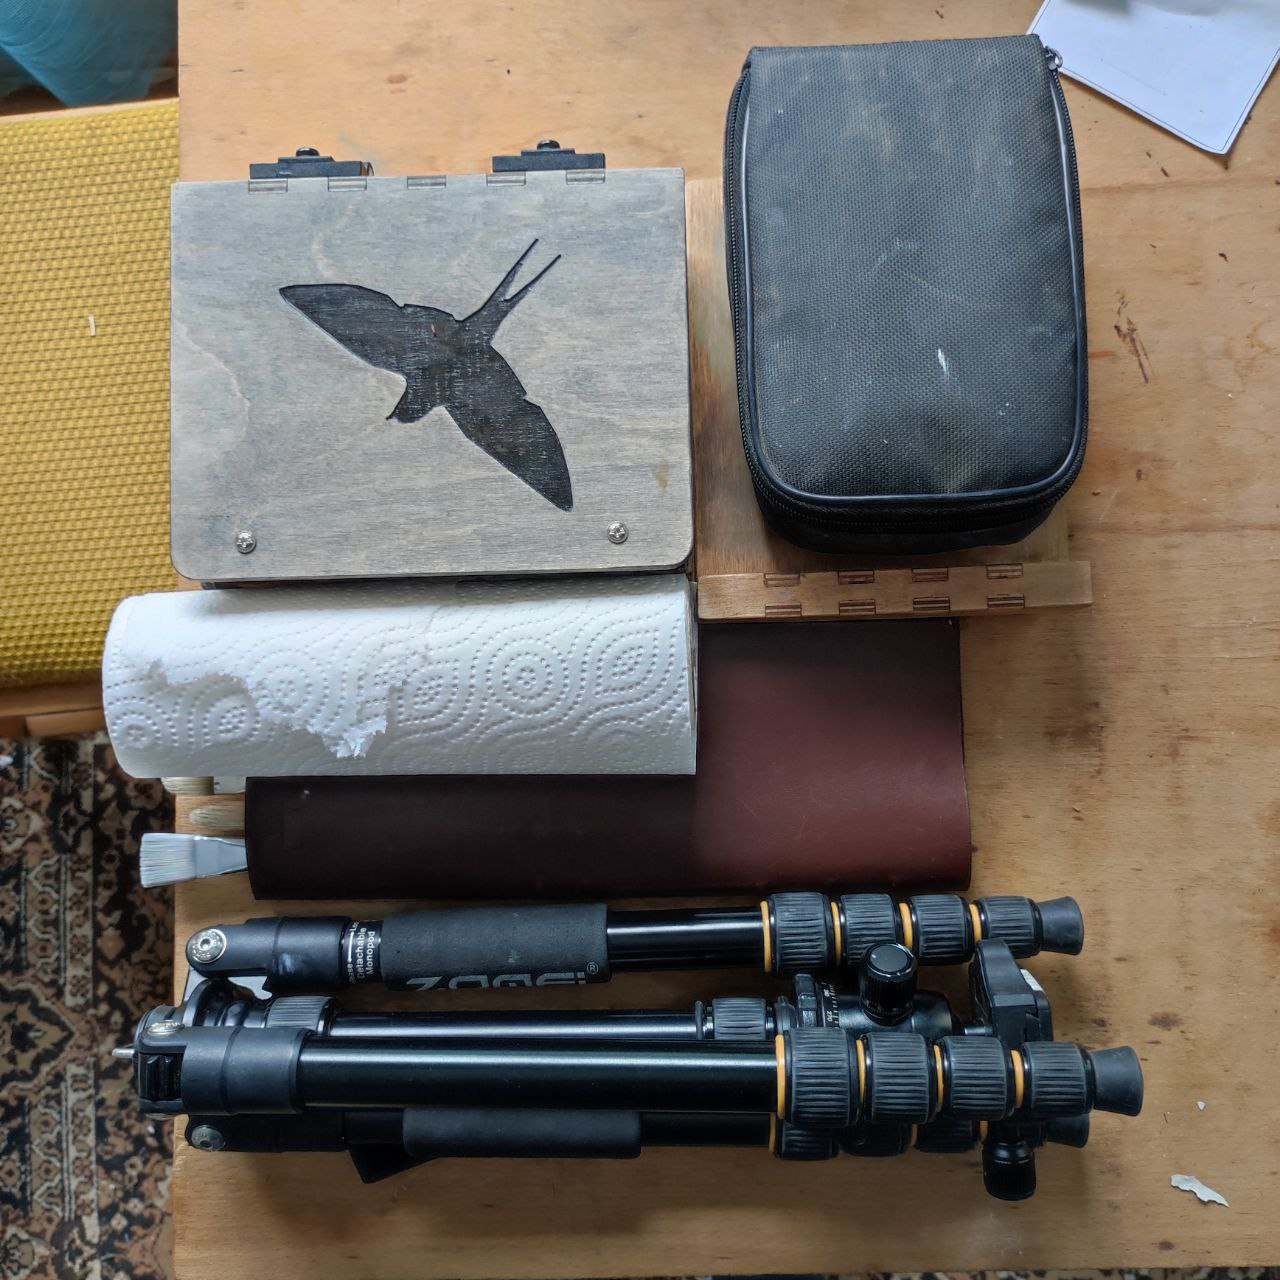
So then I pack my small things into a zipper bag and everything into my backpack. It is always lighter to store everything in a bag than in a wooden box – I mean the easel with space for materials. If I’m bold enough I could even leave more tubes at home, except the white of course. Here’s my setup packed up.

Here we go to the mountains with all this stuff!
Not very happy with the results, but had lots of fun 🙂

That’s all for now folks, hope it was helpful! Feel free to leave the comment if you have questions. See ya!